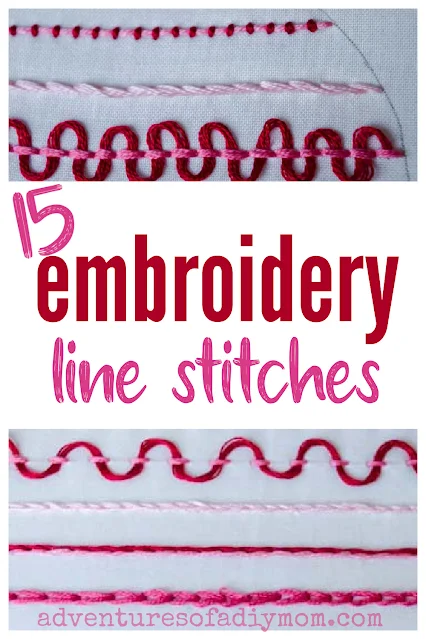
Line stitches are so very useful when creating embroidery projects. They are generally used to outline parts of your embroidery design. They are used for straight lines or curvy lines.
There are many different stitches to choose from. In this post you will learn about basic stitches as well as decorative stitches to improve your embroidery techniques.
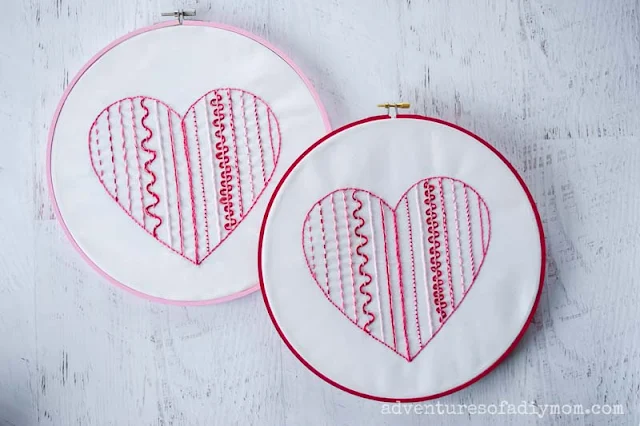
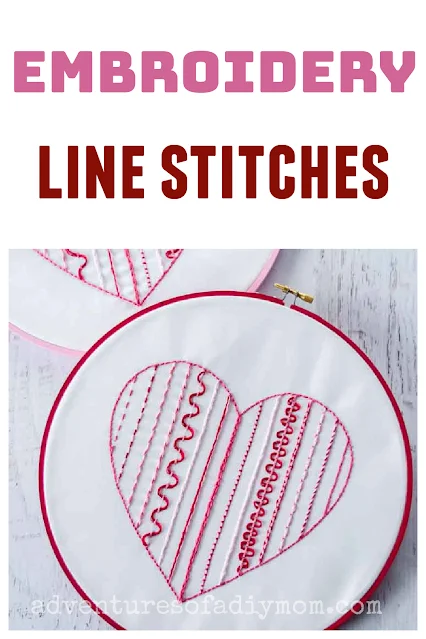
If you'd like a little practice in creating new stitches, make this darling heart embroidery sampler. Find all the details here.
15 BASIC LINE STITCHES FOR EMBROIDERY
There are a few ways to add interest and your own creative flair to embroidery projects.
Adjust the number of strands of embroidery thread you use.
For a thin delicate line use two strands of thread. For a thick, bold line increase the number of threads.
Most of the stitches depicted in this post are using all 6 strands of thread.
Another great way to add a distinctive look to your project is to change up the stitch length.
Using short stitches will help you stitch around tight curves.
Long stitches will help you embroider more quickly and add a completely different feel to the design.
This post may contain affiliate links. As an Amazon Associate I earn from qualifying purchases. Please see my full disclosure policy for details.
BASIC SUPPLIES NEEDED EMBROIDERY
Before we get into the stitches, let's review the basic supplies you will need for embroidery. I love embroidery because it is a very inexpensive hobby. There are only a few things to get before you can get started.- Embroidery hoop - wooden or plastic hoops both work well.
- Embroidery floss - you can get a big pack, or just head to the craft store and select a few colors. (DMC is my favorite brand)
- Embroidery needle
- Scissors
- Embroidery Patterns - You can find a variety of patterns on my embroidery tab.
VARIATIONS OF THE RUNNING STITCH
The following stitches are all variations of the running stitch. They are simple to sew. The different variations build upon the basic running stitch to add variety and interest to your embroidery projects. Running Stitch
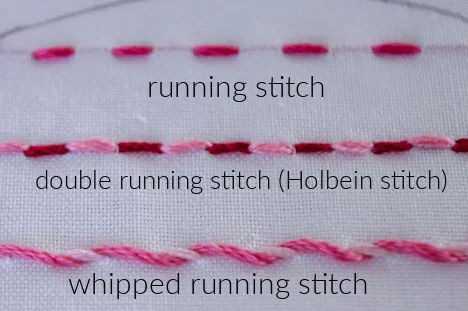
The running stitch is one of the easiest embroidery stitches. The concept is simple.Bring the needle up and down through the fabric at even intervals leaving the spaces between the stitches the same size as the stitches.
You can find the running stitch tutorial here.
Double Running Stitch
The double running stitch is also known as the Holbein stitch. The end result is similar to a back stitch. Begin by working a running stitch and then work your way back in the opposite direction filling in the empty spaces between the stitches to create a continuous line.
Add interest to this stitch by using a different color of thread as you work your way back to the beginning.
The double running stitch instructions are found here.
Whipped Running Stitch
Another variation of this basic embroidery stitch is the whipped running stitch.Again you will begin with a running stitch. Then you will work another thread into each stitch always working in a downward motion.
This can be done using the same color of thread, or different colors.
You can find the whipped running stitch tutorial here.
Double Whipped Running Stitch
The double whipped running stitch builds upon the whipped running stitch. Once you have threaded the floss all the way through the line of stitches, work your way back to the beginning. This will create a crossed effect.You can work this stitch in 1, 2 or 3 colors of thread.
How to sew the double whipped running stitch.
Laced Running Stitch
The laced running stitch is a great embroidery stitch if you want to add a big bold decorative statement to your design.Begin with a running stitch. Then weave another thread through each stitch, alternating directions each time.
The key to this stitch is to not pull the thread tight. You want it to be loopy.
This is very much a decorative stitch. Do not use it for items that will be worn or used often. The stitching will snag and ruin the effect.
Find the laced running stitch here.
VARIATIONS OF THE BACK STITCH
The back stitch is one of the most versatile stitches. It was the first stitch I learned. It's easy to sew and has such a wide array of uses.It is one of the basic embroidery stitches that is used in lots of patterns. It's a great one to practice getting your stitches even and consistent. This is definitely a stitch to master.

Back Stitch
The back stitch is a good stitch for outlining your embroidery designs.Begin the stitch a stitch length away from the end of the stitching line. Then stitch back to the beginning spot.
Bring the needle forward a stitch length away and then finish the stitch where the previous stitch ended. Continue this process.
Although you are moving forward, each stitch is going backwards to end the stitch.
Get the backstitch instructions here.
Whipped Back Stitch
The whipped backstitch is a simple stitch variation of the backstitch. Begin by working a back stitch. Then work another thread through each stitch always downward.Using two colors of floss give this stitch a fun baker's twine look.
Find instructions for the whipped backstitch here.
Threaded Back Stitch
The threaded back stitch is a beautiful stitch.Again, begin with a back stitch. Next weave another thread through each stitch, alternating direction (up or down) with each stitch.
This can be worked with one or two colors of thread.
Learn how to sew the threaded back stitch here.

Double Threaded Back Stitch
The double threaded back stitch builds upon the threaded backstitch.
Once you have embroidered the threaded backstitch, select another thread and weave again through each stitch. Make sure to go in the opposite direction for each stitch as you did with the previous thread.
This can be worked in one, two or three colors of thread.
How to sew the double threaded back stitch.
Laced Backstitch
The laced backstitch is worked in the same manner as the threaded backstitch. The difference is that you do not pull the thread snug. Leave a loop with each stitch.
This is a decorative stitch. The loops will snag easily so avoid using it on items that will be worn or used regularly.
Find the laced backstitch tutorial here.
This is a decorative stitch. The loops will snag easily so avoid using it on items that will be worn or used regularly.
Find the laced backstitch tutorial here.
MORE LINE STITCHES
Split Stitch
The split stitch looks similar to a chain stitch, but is worked in a completely different manner.
Bring the needle up and then down to create a stitch. From then on, every time you come up, you start halfway through the previous stitch, coming up through the threads to split the stitch.
How to sew the split stitch.
Bring the needle up and then down to create a stitch. From then on, every time you come up, you start halfway through the previous stitch, coming up through the threads to split the stitch.
How to sew the split stitch.
Split Stitch with 2 Colors of Thread
To work a split stitch with two colors of thread, add three strands of two different colors of thread to create a new strand. Each time you split your stitch be sure to split the colors of thread too.
Find the instructions for the split stitch with 2 colors here.
Find the instructions for the split stitch with 2 colors here.
Chain Stitch
The chain stitch is so named because it looks like links of a chain. There are several variations of the chain stitch. The most basic is the lazy daisy stitch, which is basically a detached chain stitch, or a single chain stitch.
To work a chain stitch, bring the needle up through the fabric. Then put the needle back down at the starting point. Pull the thread until there is a small loop of thread remaining. Bring the needle back up a stitch length away. Be sure the needle comes up in the middle of the loop of thread to catch it. Pull thread snug.
Repeat the stitch by putting the needle down where it just came up.
End the stitch by securing on the bottom side of the chain.
Find the chain stitch tutorial here.
Couching Stitch
The couching stitch is one of the easiest stitches. It is best used for straight stitches.
Begin with a very long stitch - from one end of the line to the other.
With another thread, tack it in place with small stitches evenly spaced.
Learn how to sew the couching stitch here.
Begin with a very long stitch - from one end of the line to the other.
With another thread, tack it in place with small stitches evenly spaced.
Learn how to sew the couching stitch here.
Stem Stitch
The stem stitch is a great stitch for curves and lettering.
Bring the thread up at the beginning point the line. Bring the needle down a stitch length away, and back up at the halfway point. Pull the thread through.
Bring the needle down a stitch length away and back up at the point at the end of the previous stitch. Continue this process.
Find the stem stitch tutorial here.
MORE EMBROIDERY PROJECTS
- How to Finish an Embroidery Hoop
- 40+ Embroidery Patterns for Beginners
- 45+ Floral Embroidery Patterns
- Free Fall Embroidery Pattern
Don't forget to pin it!!


0 comments