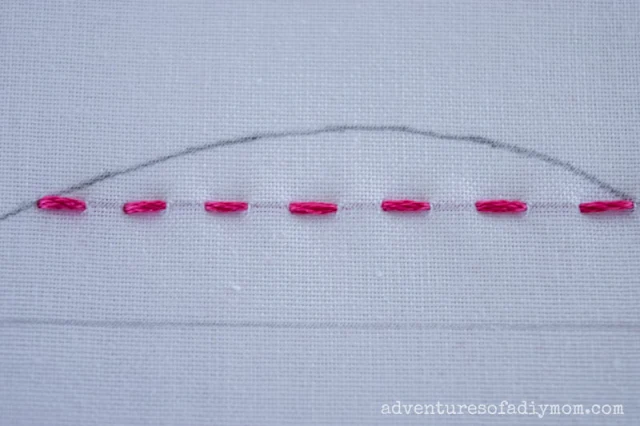
The running stitch is one of the easiest embroidery stitches.
It's a versatile stitch that's both useful in everyday life, as well as adding homespun charm to your sewing projects and crafts.
Running stitches are a simple stitch great for working a straight lines, but it also works well for gently curved lines. It also works well as an outline stitch.
This tutorial is the first stitch for the Heart Sampler Stitch Along.
Come back each day to learn a new type of stitch. It's a great way to learn all the basic embroidery stitches. Tomorrow we are learning the double running stitch.

HOW TO DO A RUNNING STITCH (FOR HAND EMBROIDERY & MORE)
This tutorial is geared toward embroidery sewing. However this most basic stitch is handy for anytime you need to quickly sew something together.You can use it as a basting stitch, for hand quilting, to sew together two pieces of fabric, mend clothing, or patch holes.
My son recently left on a mission for our church. He has no interest in sewing. However, I felt it would be good for him to be able to mend his clothing while he's gone. This was the basic stitch I taught him.
And sure enough, he's popped a seam on his favorite pair of suit pants. Now he has the skill to fix it.
That's the beauty of this stitch. It's useful and functional for even the most inexperienced. Yet, it can add a lovely touch to your embroidery projects too.
This post may contain affiliate links. As an Amazon Associate I earn from qualifying purchases. Please see my full disclosure policy for details.
HOW TO SEW A RUNNING STITCH
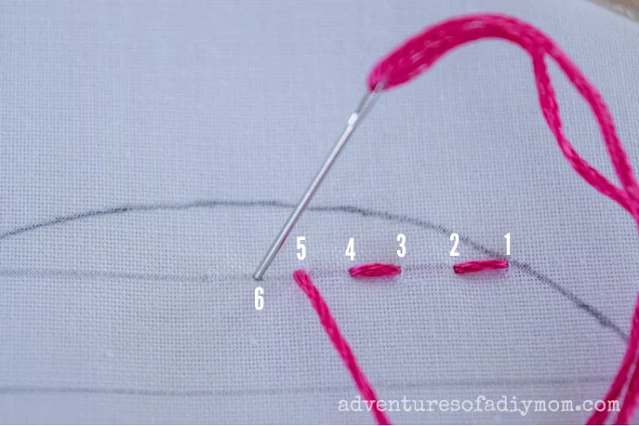
The basic concept is to bring the needle up and then back down over and over, with the length of the stitches being equal to the space between the stitches.In the image below, I've labeled each point where the needle goes through the fabric.
First tie a knot in the end of your thread.
Next, place your needle on the back side of the fabric at the starting point (1), push the needle through the fabric to the top side of your work, pulling all the embroidery floss along with it.
Then place the point of the needle at point (2) and push it through to the back of the fabric.
Repeat this process again and again.
This embroidery technique is considered the stabbing method. You can also see the sewing method in my video tutorial.
In summary, in spot 1, 3 and 5 the needle comes up from the back of the fabric.
In spot 2, 4 and 6 the needle is going down from the top to the back.
You can adjust the look of the running stitch by using different stitch lengths.
You can also do long stitches with short spaces, or vice versa for a completely different look.
It's sometimes hard to picture exactly what to do with a still image. So I've created a video for you!
Want to watch the video? ↓↓Click the link ↓↓
VARIATIONS OF THE RUNNING STITCH
Want to dress up the running stitch? Try one of these decorative stitch variations.These posts are coming up - links may not yet be active.
- Double Running Stitch
- Whipped Running Stitch
- Double Whipped Running Stitch
- Threaded Running Stitch
- Stepped Running Stitch
- Looped Running Stitch
MORE HAND EMBROIDERY STITCHES
Learn some more of these common basic stitches for hand embroidery.Posts coming soon.
- Back Stitch
- Whip Stitch
- French Knots
- Chain Stitch
- Stem Stitch
- Couching
Don't forget to pin it!!


0 comments