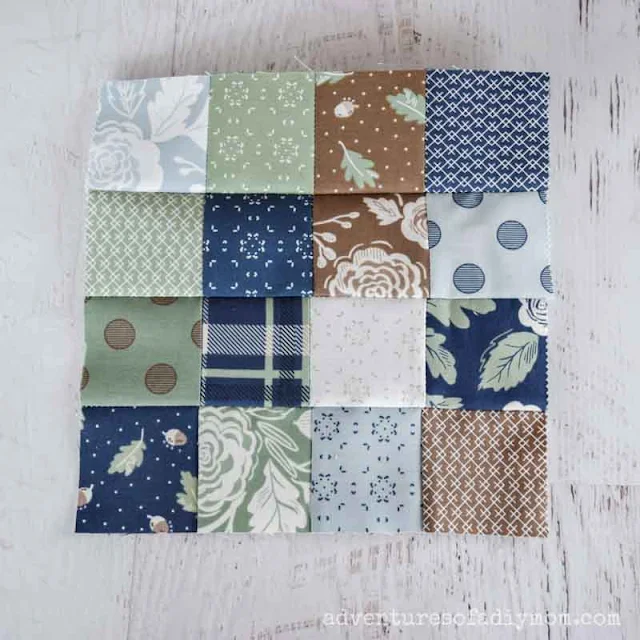
Bonus: Using the strip method helps your corners match up nicely giving you lovely patchwork quilt blocks.
Bonus #2: Free printable cutting chart for several block sizes! (At the bottom of the post.)
16 PATCH QUILT BLOCK (using strips)
I recently made a quilt for a new baby in the family. The quilt featured two quilt blocks - this 16-patch quilt block and sawtooth star quilt blocks. I'll be sharing the quilt soon.This is not the only way you can make a 16 patch quilt block. You can also sew together 4 four-patch units. Or you can sew together all 16 squares individually.
I find the strip method to be a quick way to make lots of blocks at once. If you only need a few blocks, you could try another method.
This post may contain affiliate links. As an Amazon Associate I earn from qualifying purchases. Please see my full disclosure policy for details.
SUPPLIES NEEDED FOR QUILTING
Don't let the supplies you have limit you with the projects you want to make. There are a LOT of quilting supplies out there. Start with the basics: a rotary cutter, mat and straight edge. And of course a sewing machine. If you find you have a love for quilting, then you can get more supplies as needed.- fabric
- thread
- rotary cutter / cutting mat / straight edge
- sewing machine (This is my new machine that I absolutely love!)
- sewing scissors
- iron and ironing board
HOW TO MAKE 16 PATCH BLOCKS IN DIFFERENT SIZES
Learn better by watching? Here's the video.For this tutorial, I made 8 inch quilt blocks. There's a simple formula to make different sizes.
Finished block size + 2 ÷ 4 = strip width
Using my 8 inch block as an example, 8 + 2 = 10. 10 ÷ 4 = 2 1/2. So I need to start with 2 1/2 inch strips.
You can use this same formula to create any size blocks. If you don't want to do the math, I've figured out the most common block sizes for you.
3 inch block: cut 1 1/4 inch strips
6 inch block: cut 2 inch strips
8 inch block: cut 2 1/2 inch strips
10 inch block: cut 3 inch strips
12 inch block: cut 3 1/2 inch strips
15 inch block: cut 4 1/4 inch strips
18 inch block: cut 5 inch strips
I've got a handy printable page with the cut sizes and instructions for easy reference. Simply choose the size of block you prefer to find the strip widths. Simply sign up with the form at the bottom of the post and the printable will be sent directly to your email.HOW TO MAKE 16-PATCH BLOCKS
Using fabric strips to make a 16 patch block helps with accuracy. Since this block finishes at 8", I started with 2 1/2 inch strips.I used a layer cake to cut my strips from. Fat quarters or scrap fabric work well too. If making 8" or smaller blocks, jelly roll fabric can be used.
Arrange the strips and sew them together using a 1/4 inch seam allowance.
Once the fabric is sewn together, press seams to one side.
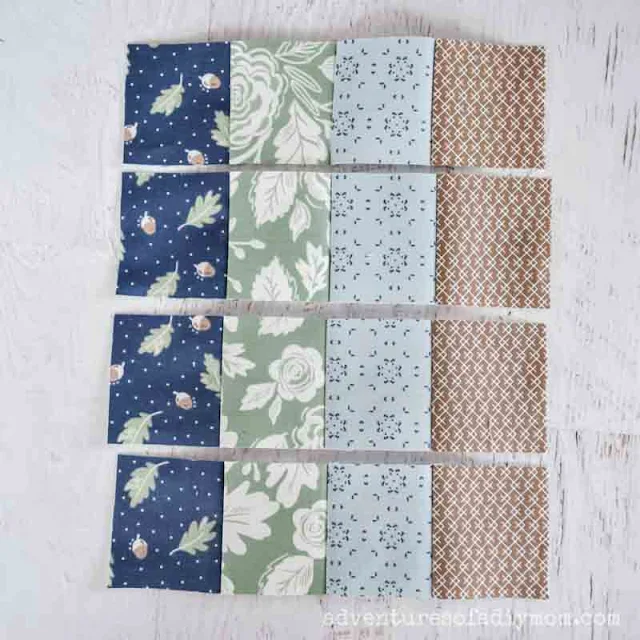
Next the sewn strips into 2 1/2 inch strips. Each strip will now have 4 different fabrics in it.
Repeat with several times with a variety of fabrics.
Once you have at least 4 different strip sets, you can put together your 16 patch.
Arrange the strips in a manner you like. To ensure each of your squares line up exactly, it's important that you nest your seams.
To nest, the seams of one strip should face the opposite direction of the seams on the next strip. Depending on how you lay out the strips, you may need to press the seams on some of the strips the opposite direction before sewing.
Using a 1/4 inch seam allowance sew together the strips. Press the seams to one side.
Repeat this process to make a variety of 16 patch blocks.
Want to watch the video? ↓↓Click the link ↓↓
FREE PRINTABLE 16 PATCH CHEAT SHEET
MORE EASY QUILT BLOCKS
Find even more free quilt block patterns.- Nine-Patch Block
- Half Square Triangles
- Hour Glass Quilt Block
- Shoo Fly Quilt Block
- Churn Dash Quilt Block
- Flying Geese
QUILT PATTERNS TO MAKE
- EASY Quilt Patterns
- Layer Cake Patterns
- Charm Pack Quilt Patterns
- Jelly Roll Quilt Patterns
- Log Cabin Quilt Patterns
- Christmas Quilt Patterns
- Star Quilt Patterns


Thanks for this. I've been making the 16 square blocks for a couple of years but having a multitude of trouble getting those pesky corners to line up. This is a great way and I'm about to get my machine out and start tonight, even is it IS almost 10:00. Thanks much for sharing the idea.
ReplyDelete