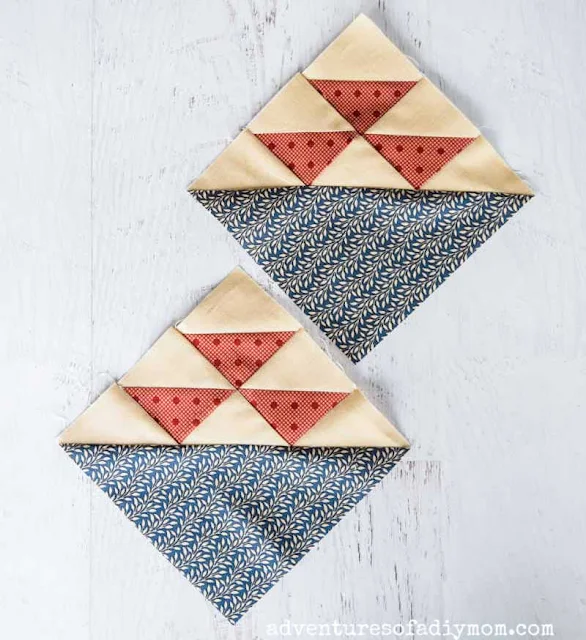
The Birds in the Air quilt block is a classic block that has been used since the era of the civil war.
In this tutorial you will learn how to make TWO blocks at the same time.
BIRDS IN THE AIR QUILT BLOCK (Make 2 at a Time)
This year I've begun my journey into the quilting world. I began with the most simple of quilt blocks, like the four patch, and the nine patch. This block is slightly more complicated, but is still a great beginner block.Click here for instructions to make just one birds in the air block.
This post may contain affiliate links. As an Amazon Associate I earn from qualifying purchases. Please see my full disclosure policy for details.
SUPPLIES NEEDED FOR QUILTING
- fabric
- thread
- rotary cutter / cutting mat / straight edge
- sewing machine
- sewing scissors
- pencil
- iron and ironing board
- square quilting rulers
FABRIC REQUIREMENTS FOR A 6" BIRDS IN THE AIR BLOCK
Cut the fabric to the following dimensions. I listed the colors I used, but feel free to change it up.
- 1 dark (red) color 6 inches square
- 1 light (beige) color 6 inches square
- 3 light (beige) color 2 1/2" X 3 1/4"
- 1 dark color (navy blue) 7" X 8"
HOW TO MAKE THE QUILT BLOCK
Throughout the post I will use the abbreviation HST to indicate half square triangle.
As usual, I've made a video tutorial. Be sure to watch and go ahead and subscribe while you're at it 😉.
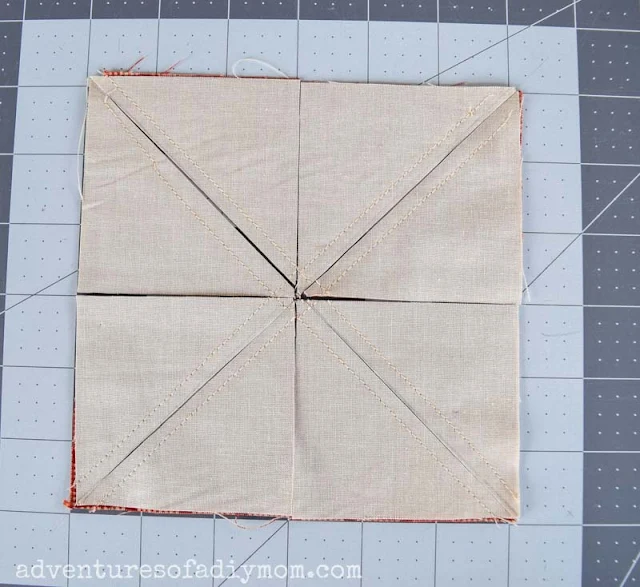
Begin with the two 6 inch squares. Place them on top of each other with right sides together.
Draw a line from corner to corner making an x on the fabric. Sew 1/4 inch on both sides of both lines.
Next, cut exactly at the center both vertically and horizontally. Then cut on the drawn X between the two seams. Open and press each piece.
This will create 8 half square triangles. You will need six of them for this quilt block.
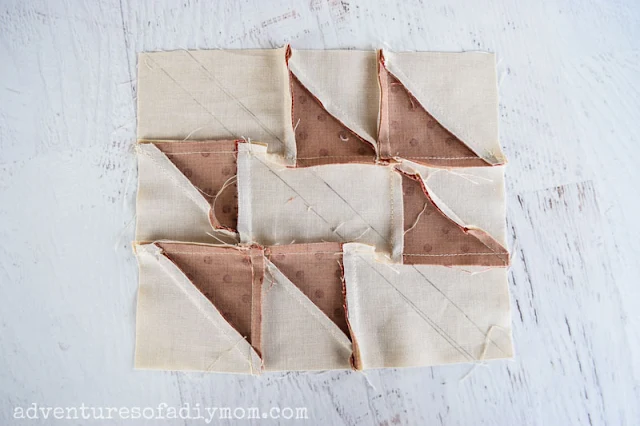
Next we'll lay out the pieces.
The top row begins with two HST's (dark points down) and a rectangle.
The middle row has a HST (dark point down), a rectangle, and another HST (dark point up).
The last row begins with a rectangle and then has two HST's (dark points up).
Now sew piece in each row together using a 1/4 inch seam allowance. Press the seams flat. Then sew each row together. Press seams.
With the back facing up, draw 45 degree angle line from one corner to the bottom (It will not meet up right at the corner). The points of the triangles should be right at the line.
I use the 45 degree marking on my ruler to line up the edge of the block and then adjust until the side lines up with both points of the triangle.
Repeat this process, but line up the other two triangles.
This is what it should look like.
Place the pieced block on top of the 7" X 8" piece. It will not line up exactly because the 7" X 8" piece is larger than the pieced block. We'll trim it up later.
Sew along the two drawn lines.
Cut between the two seams. Open each triangle and press the seams flat.
Lastly, we'll square up the block. Using a 6 1/2" square ruler, line up one side along the red and beige side of the square. Trim the excess from the blue side.
There you have it. TWO birds in the air quilt blocks at once!
Want to watch the video? ↓↓Click the link ↓↓
MORE QUILTING TUTORIALS
- Jacob's Ladder Quilt Block
- Shoo Fly Quilt Block
- Nine Patch Table Runner
- Basket Block
- Sawtooth Star Quilt Block
Don't forget to pin it!!


Great tip, thanks for sharing!
ReplyDeleteThis is a great technique! Thanks for sharing the tutorial and video.
ReplyDeleteHi Rachel! I wanted to drop a quick message to let you know that I featured your awesome tutorial on Crafts on Display, a growing community of crafting enthusiasts. You can check it out here – https://craftsondisplay.com/quilting/birds-in-the-air-quilt-block-31727/
ReplyDelete