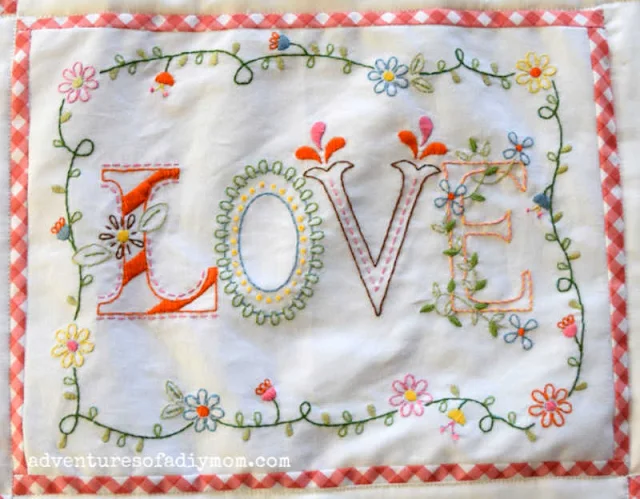
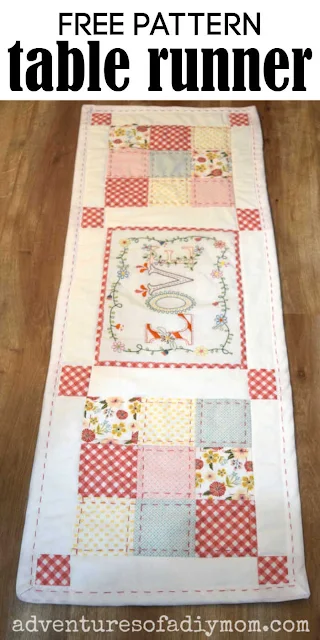
This runner features nine patch quilt blocks made from fat quarters and a flowery embroidery pattern in the center.
I've made a few table runners in the past, like this fall table runner with three dimensional flowers.
I also made a no-sew winter runner with snowflakes.
But I think this one is my favorite.
I love the spring vibe from the floral embroidery and the light patterned fabrics.
QUILTED TABLE RUNNER TUTORIAL
I've really been enjoying learning how to piece quilt lately. I've started piecing a quilt where I'm learning and sharing a new block each month.So far I've learned how to make half square triangles, four patches and put them together into a Jacob's Ladder block. More is coming!
I had this idea for a table runner and I just had to run with it.
Even though it may put me a little behind on the quilt.
It's been quite a long process to make, photograph, video and write up the instructions.
But it's SO worth it, because I LOVE how it turned out.
This post may contain affiliate links. As an Amazon Associate I earn from qualifying purchases. Please see my full disclosure policy for details.
SUPPLIES NEEDED FOR DIY TABLE RUNNER
- love embroidery kit + additional thread if desired
- 1 yard white fabric
- 5 fat quarters in coordinating colors
- batting
- thread
- 3 yards of 3/4" quilt binding
- iron & board
- point turner
- sewing machine
- rotary cutter / mat / straight edge
CUT LIST FOR QUILTED TABLE RUNNER
Center block:
- love embroidery cut to 8 1/2" X 11"
- 2 pieces 1" X 11
- 2 pieces 1" X 9 1/2"
Nine patches:
- 18 - 3 1/2" squares to make 2 nine patch blocks
Sashing and cornerstone blocks:
- 8 pieces - 2 1/2" X 9 1/2" (sashing)
- 2 pieces - 2 1/2" X 11 1/2" (sashing)
- 8 pieces - 2 1/2" X 2 1/2" (cornerstone blocks)
HOW TO MAKE A QUILTED TABLE RUNNER
Note: I decided not to do the lazy daisy stitch, because with the printed outline, it was hard to get the thread to line up exactly over the printed blue lines. I found it looked better with regular stitching.
For those interested here is a list of the colors I used and the DMC floss color code
- dark green - 3345
- green - 3347
- light green - 3013
- orange - 720
- brown - 801
- yellow - 743
- pink - 899
- blue 931
- red 3328 (for the stitching on the nine patch blocks and the border)
The final size of the runner is 13 1/2" X 37 1/4".
Note: All seams are sewn with a 1/4 inch seam allowance.
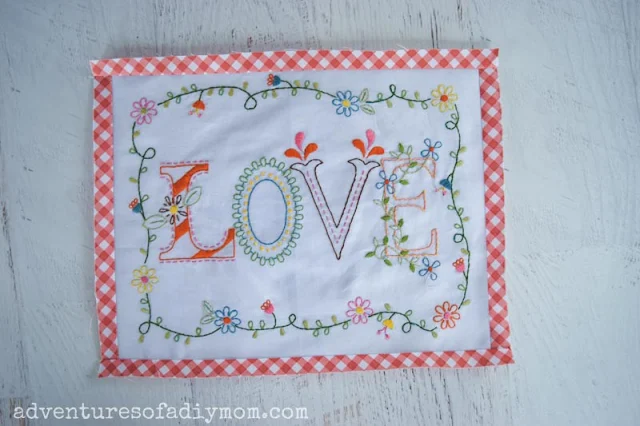
Let's start by turning our embroidery into the center block of the table runner.
Trim the embroidery fabric to 8 1/2" by 11". Keep the embroidery centered.
Cut strips of fabric 1 inch wide and slightly longer than the embroidered fabric piece. With 1/4" seam allowance sew the short sides, trim. Then sew the long edges. Trim and press flat.
Sew together two 9" nine patch blocks. Each blocks begins with nine different pieces of fabric cut into 3 1/2 inch squares. Fat quarters work great for these. See the tutorial for in depth instructions.
Add white pieces (2 1/2" X 9 1/2") to top and bottom of each nine patch. Sew in place with 1/4 inch seam allowance and then press flat.
Add the white pieces (2 1/2" X 11 1/2") to the top and the bottom of the embroidery block in a similar manner.
Sew a 2 1/2" block to each end of the remaining white strips. Place one at each end of the table runner and one between each block.
Sew each sashing strip in place with 1/4 inch seam allowance.
Now it's time to add a little more embellishment. I added a running stitch along the edges of the nine patch. This is totally optional, but I love how it turned out.
In order to keep my stitching in straight lines, I used a point turner to "score" lines in the fabric.
I took a ruler and placed it 1/4 inch from the seam and then ran the point turner along the straight edge. It's a great way to leave a mark without harming the fabric or leaving unsightly marks.
The "scored" lines pretty much just blend in with the stitching.
Before we add the stitching, let's cut out our batting and back. Using the top as a guide, cut out a piece of batting and a piece of fabric for the back.
I originally wanted to stitch the whole thing together, so the stitching would be visible on the back. BUT I didn't like how it looked.
So I pinned the batting to the top and stitched the two together with the running stitch. I used three strands of thread #3328.
Now pin the back to the other layers. Sew the pieces together along the sashing strips.
See the dotted black lines below? Those are the seams to sew along. (Keep in mind that the binding will not be in place at this point)
Now it's time to sew the binding in place. I used double fold bias tape quilt binding. One package of 3 yards was just the right amount with just a little bit of extra. You can make your own binding by following this tutorial.
This is probably the hardest part to explain, so be sure to catch the video if you need more help.
Start along the side at least 3-4 inches from the corner. Pin the binding in place and sew until you are about 1/2 inch from the end.
Next, turn the binding and fold and manipulate it until it forms an angle. Pin the corner securely and then pin the binding to the next corner.
Sew the binding in place, stopping 1/2 inch from the next corner.
Continue around until you get back to where you started. To finish off the end, simply overlap the binding about a 1/2 inch and fold the end underneath itself. Sew in place.
Lastly, I added a running stitch along the binding to tie everything together. I didn't want to stitch through all the layers.
I made sure I had enough thread to stitch the entire length of one side (three strands again). Then I knotted the end and tucked it under the mitered corner and carefully stitched through just the top layer of the binding. Once I reached the end, I again hid the knot in the mitered corner.
Repeat this process with each side of the table runner.
Want to watch the video? ↓↓Click the link ↓↓
Don't forget to pin it!!


0 comments