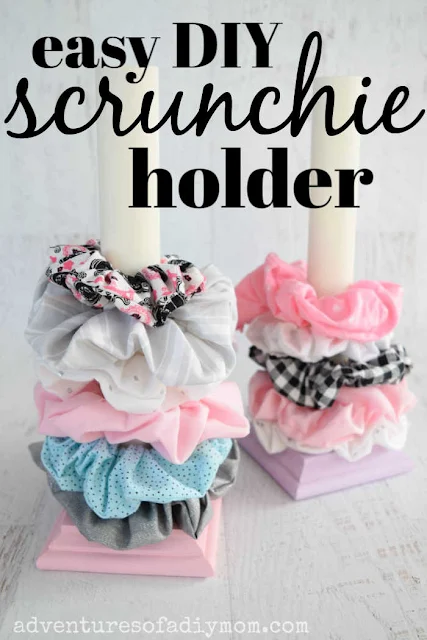
Do you guys remember how my girls became obsessed with making scrunchies last summer? They've made scrunchies with bows and no-sew scrunchies using all of my fabric scraps. When I ran out of scraps, they began making scrunchies from old t-shirts.
Well it's time for some storage for them. I came up with a really easy and inexpensive scrunchie holder if anyone needs a way to display them and keep them corralled.
DIY SCRUNCHIE HOLDER
There are two methods (both quite similar) that you can use to make these scrunchie stands.
I'm a big fan of power tools, but I realize that not everyone has access to them. So I tried to make a version that anyone can make.
I'm a big fan of power tools, but I realize that not everyone has access to them. So I tried to make a version that anyone can make.
This post may contain affiliate links. Please see my full disclosure policy for details.
SUPPLIES NEEDED FOR A DIY SCRUNCHIE STAND
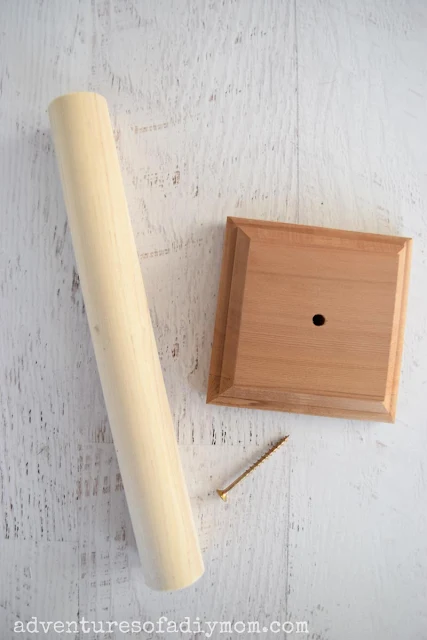
- 4 X 4 inch cedar post cap with a pre-drilled hole in the center
- 1 1/4 inch dowel, cut to 10 inches long*
- 2 inch screw
- wood glue
- 1 1/4 inch drill bit and drill (optional)
- screwdriver
- paint / stain (optional)
*I got the dowel at my local hardware store. They come in 36 inch lengths. If you don't have a saw at home, ask them to cut it for you.
HOW TO MAKE A SCRUNCHIE DISPLAY
There are two ways to make this scrunchie holder. Both are really easy, it will just depend on what tools you have available to you.
Easy DIY scrunchie holder - no drill required.
- Add a bit of wood glue to one end of the dowel.
- Center the dowel over the hole in the end cap.
- Screw it in place using a screw driver.
That's it. Then paint or stain as desired.
Making a scrunchie stand with a drill
If you would like to add a little bit more stability to your scrunchie holder, and you have access to a drill and 1 1/4 inch drill bit, try this method.- Using the 1 1/4 inch drill bit drill a hole about half way through the block.
- Add some wood glue to the end of the dowel and insert it into the hole.
- Screw the dowel in place from the bottom.
- Paint or stain as desired.
I kind of liked the wood look, but my girls wanted to paint them. They're also obsessed with painting things!
MORE DIY PROJECTS
Don't forget to pin it!!


0 comments