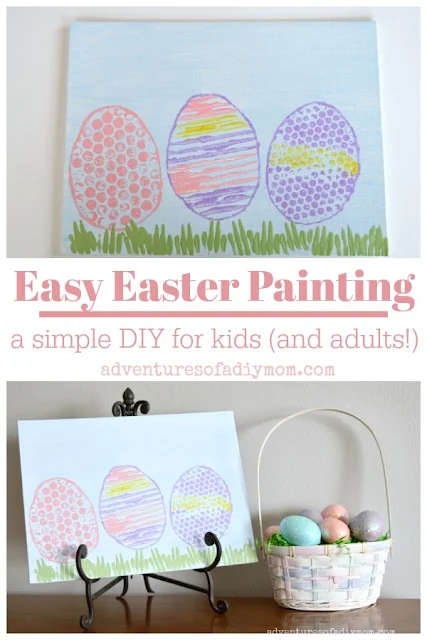
Easter Painting on Canvas
I do not consider myself an artist. I've never really enjoyed drawing or painting - probably because I'm not very good at it ;) HOWEVER, even with my limited art skills, I was able to create this fun Easter egg painting.
The secret?! I used everyday items to create the texture and designs of the eggs. Keep reading to find out what items I used.
This month for the Inspire My Creativity link party, the theme is pastel colors. I'm loving the spring vibe these colors bring.
This project is great for older kids, tweens, teens and even adults. Toddlers and young kids could do it with help. It would make a fun Activity Days activity. My girls are 9 and 11 and had a blast making these fun Easter paintings. See their canvas's in the collage below.
As always, I've got step-by-step instructions and pictures. Keep scrolling for a how-to video as well. Let's get started!
This post may contain affiliate links. Please see my full disclosure policy for details.
Supplies needed for Easter Painting
- canvas
- paint
- foam paint brushes
- outlining paintbrush
- cardboard
- bubble wrap
- Easter egg template
- plastic fork
- scissors
How to Make an Easter Egg Canvas Painting
1 - Create your egg stamps
Let's begin by cutting out our egg "stamps". Remove the outer layer of the cardboard revealing the inner corrugated layer.
Using the printable egg template, cut out egg shapes in the cardboard and bubble wrap.
Set them aside, we'll use them later.
2 - Paint the background color on the canvas
I painted mine blue like the sky. I did a very light coat - you can still see the white peeking through.
3 - Paint the egg "stamps" and stamp on canvas
Paint the ridges of the cardboard egg. Paint them all the same color, or use different colors to create unique eggs.Then place them upside down on the canvas and press gently to "stamp" the egg on to the canvas.
Tip: To get crisper lines or circles, avoid getting paint in the grooves.
Repeat the process with the bubble wrap egg. Don't worry if they don't look too much like eggs, yet. We're not quite done.
4 - Paint an outline around each egg.
The eggs don't quite look like eggs yet. With a small tip brush, paint an outline around the egg.Tip: It may be helpful to wait until the "stamps" are dry before outlining. That way the paint doesn't get smudged.
5 - Paint the grass
Take a plastic fork, break off the tips of the two outer tines. This will create a less uniform look, and give the grass a little bit more of a natural look (without having to be an artist!)Place the fork in the paint and then press on the bottom edge of the canvas.
Tip: It's tricky to get the right amount of paint. Practice on a piece of paper first.
There you have it! An easy, simple Easter egg canvas painting.
↓↓ Here's the video. Don't forget to subscribe! ↓↓


How fun! I love creative projects using unusual supplies! This turned out darling!
ReplyDeleteThanks, I'm glad you like it!
DeleteGreat idea to make stamps out of items you already had. My kids would really enjoy this too.
ReplyDeleteThank you! I really love crafts that I can use what I have around the house.
DeleteWhat a darling idea! I love how these turned out! It's so fun to use the different textures.
ReplyDeleteSometimes, you just have to sit down, and be messy, and painting things, you know? I really love this!
ReplyDeleteAlexandra
EyeLoveKnots.com
This turned out so cute! Very clever, my friend!
ReplyDeleteUsing items I already have at home is my favorite type of craft project to do with my kids!
ReplyDelete