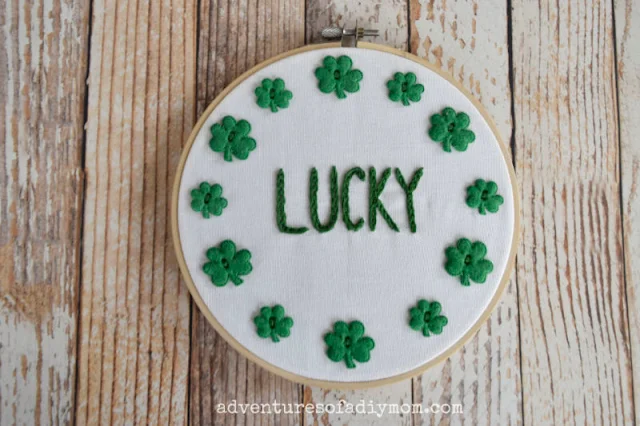
Perfect for any season or holiday, simply change up the buttons/thread to coordinate.
I came across these felt shamrock buttons and knew I had to make something with them.
A quick detour to the embroidery floss section of the store and I had an idea.
I would make embroidery art embellished with the shamrocks.
EASY EMBROIDERY WITH FELT BUTTONS FOR ST. PATRICK'S DAY
Embroidery is something I would love to become better at.I often tend to stick with easier projects like this LOVE hoop or this Spiderweb hoop set.
A couple projects that really stretched me in terms of learning new stitches this Mother's Day embroidered apron and this Happy Fall embroidery.
This post may contain affiliate links. As an Amazon Associate I earn from qualifying purchases. Please see my full disclosure policy for details.
SUPPLIES NEEDED FOR EMBROIDERY
- fabric - I used white duck cloth (anything fairly thick and sturdy will do)
- embroidery thread
- embroidery hoop
- shamrock felt buttons
- scissors
- paper/pencil
It was time to make my design. I envisioned a wreath of shamrocks with swirls and curly cues.
If I was home, I would probably have found a wreath pattern online, printed it off and then incorporated my shamrocks into it.
However, when I made this, I was on a trip.
I didn't have access to a printer and my art skills are not at the level needed to create what I envisioned.
Instead, I went simple.
Using the embroidery hoop to determine size, I sketched an inner circle along which the buttons would be sewn.
In the center, I wrote the word lucky with block letters.
TRANSFERRING THE EMBROIDERY PATTERN TO FABRIC
There are different ways to do this.You can use transfer paper or you can use a light box.
The most versatile option is to use a window, preferably with sunlight coming through it.
I find it works really well and I haven't had to spend money on a light box.
Or dig through my supplies trying to find transfer paper.
I always have access to a window.... even when I'm away from home.
Place your pattern on the window, using tape to secure it.
Place your fabric on top of the pattern lining it up where you want it.
Tape the fabric in place.
Using a sharp pencil, trace the pattern onto the fabric. I have always used a pencil.
The downside is that it's not really erasable on fabric. I just make sure that my stitching covers it up so I can't see the pencil line.
There are specialty pens that will dissolve with heat or water.
EMBROIDERING THE LETTERS
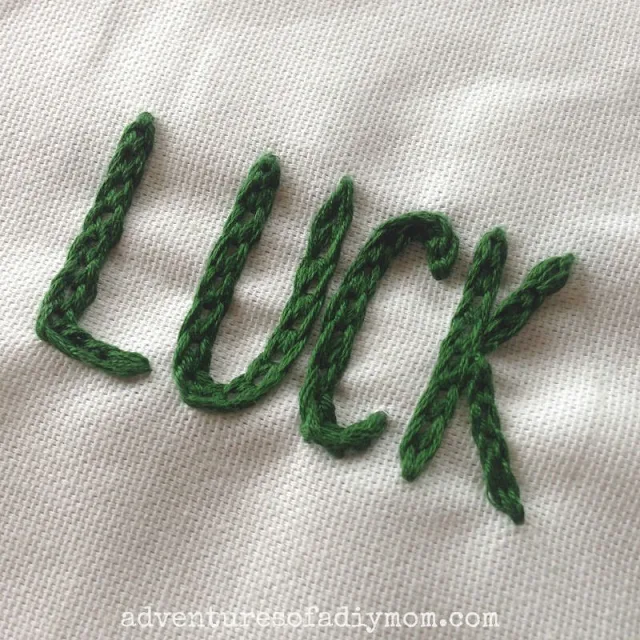
Since my design was so simple, I decided to up my skills and learn a new embroidery stitch.I used the braided chain stitch (see the tutorial)
It creates a thick, almost embossed look.
I do suggest spacing the letters a little farther apart when using this stitch.
ADDING THE BUTTONS
Once the word was stitched in place, I placed the buttons around, spacing them evenly. I drew a small dot with a pencil through the button holes. Then I began sewing on each shamrock.FINISHING OFF THE EMBROIDERY HOOP
One of the easiest ways to finish off your embroidery hoop is found in this video. It's pretty slick!But I didn't leave enough fabric all the way around the hoop to do this method.
Instead, I trimmed the edges and simply hot glued the fabric to the hoop.
It's not professional looking, but it works and you can't tell from the front anyway.
You could also turn your embroidery into a pillow, like I did with this cute DIY embroidered pillow.


I really appreciate quick and easy projects. Those buttons were a great find. They look like you embroidered them.
ReplyDeleteThank you for sharing with Creative Crafters. Our next month's challenge theme is Easter. If you would like to join the group you can do so here - https://www.facebook.com/groups/creativecraftersgroup/.
ReplyDeleteI haven't embroidered in years. It seems to be making a comeback. I'll have to get out my hoops and needles.
ReplyDeleteThis turned out so cute! I love the shamrock buttons!
ReplyDelete