I chose to stain all the wood, except the backing, which I painted white.
I love the monochromatic look, with the slight variations in color from the different pieces and grains of the wood.
Welcome to Day 7 of the Fourth Annual 12 Days of Christmas Series! We have teamed up with 50 plus bloggers to bring you a oodles of DIY Ideas and Recipes to make your holiday season merrier. There are 12 different posts in the series and we have spread them out over a four week period with three posts per week. Now is the time to subscribe!
GO HERE for the complete list of Dates and Topics plus a collection of most popular holiday ideas including ornaments, games, recipes and more from all 50 plus talented bloggers!
Day 1 - Poinsettia Wreath
Day 2 - Customized Sharpie Mugs Gift Idea
Day 3 - Days Til Christmas Wall Hanging Sign
Day 4 - Salt Dough Gingerbread Ornaments
Day 5 - Crab Stuffed Mushrooms
Day 6 - Wood Slice Nativity Ornaments
It's Day 7 and we are sharing Holiday Decor Ideas!
Wooden Christmas Tree Shadowbox Sign
Supplies needed for Wooden Christmas Tree Shadowbox
3/4" square dowels
1" X 2" board
1/4" wood backing
stain - I used Early American from Minwax
paint
nail gun / nails
wood glue
hot glue
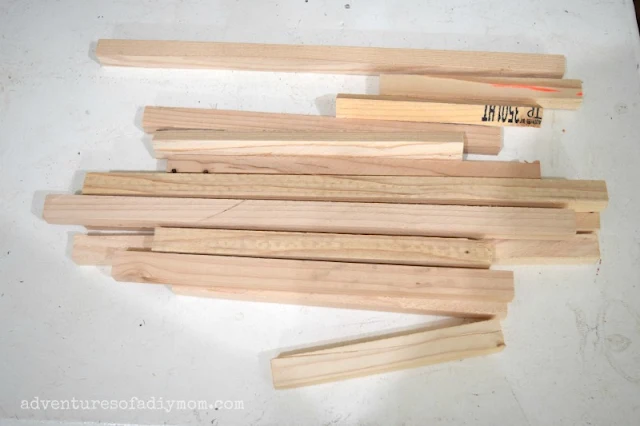
I had a pile of these square boards. I had trimmed down some boards and the remaining pieces were almost square. Feel free to use 3/4" square dowels.
How to Make a Wooden Christmas Tree Shadowbox
1 - Trim the dowels to the following sizes.
2 of each: 2", 7", 8"
and one of each: 1", 3", 4", 5", 6", 9"
Sand them down.
2 - For the frame, from a 1" X 2" cut:
two pieces 10 1/2 inches long
two pieces 12 inches long
Stain the pieces for the frame and for the tree. Also stain the wooden star. I used early american stain from minwax.
3 - Cut a 12 " X 12" piece of 1/4" backing.
Paint with white paint.
4 - Build your frame. Using wood glue and a nail gun, build your frame with simple butt joints. The ends of the 10 1/2 inch pieces butt up against the sides of the 12" pieces to form a square. Attach the back with the nail gun.
5 - Attach the tree pieces with hot glue. I used this clear ruler, placed in the center to help guide the placement of the pieces.
Don't forget to pin it!


What a pretty wooden tree. Thanks for the great tutorial, I would love to make one.
ReplyDeleteLove the rustic charm of your wooden tree shadow box!
ReplyDeleteWhat a cute and simple way to bring some rustic charm to the Christmas decor! Love it!
ReplyDeleteBest,
Kelly
What a cute idea for a DIY Christmas tree! I love the idea of putting it in a shadow box.
ReplyDeleteWhat a lovely idea for a shadow box! The rustic tree looks great.
ReplyDeleteThat is such a lovely idea. It works as a nice decoration for winter.
ReplyDeleteSuch a cute idea! I love the simplicity of it and that you just stained the wood instead of painting it.
ReplyDeleteIt's just lovely!
ReplyDeleteThank you for sharing at The Really Crafty Link Party. Pinned!
Great ideas, thank you for bringing it to FF.
ReplyDeleteThis is such a fun idea! And I'll bet hubby has all the scrap lumber to make it too!
ReplyDelete