As much as I love advent calendars, I didn't know if I wanted/needed another. AND I have made so many that I didn't have any ideas. It took me a while, but I finally came up with a countdown idea. And you know what?! I think it's my favorite so far!
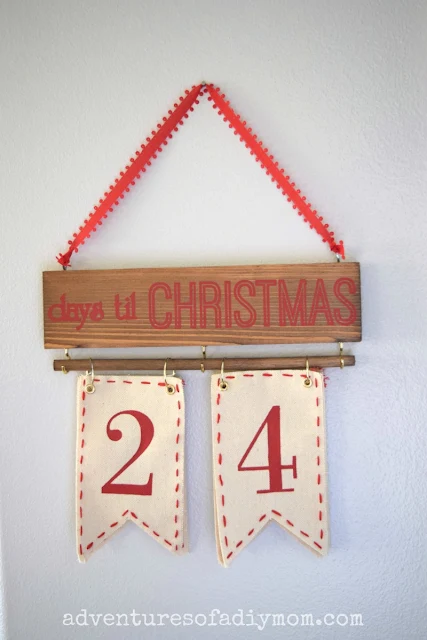
This countdown is made with a wood sign, and numbered fabric pennants to count down the days. I won't say that it's the easiest thing I've made, but it sure turned out cute.
Welcome to Day 3 of the Fourth Annual 12 Days of Christmas Series! We have teamed up with 50 plus bloggers to bring you a oodles of DIY Ideas and Recipes to make your holiday season merrier. There are 12 different posts in the series and we have spread them out over a four week period with three posts per week. Now is the time to subscribe!
GO HERE for the complete list of Dates and Topics plus a collection of most popular holiday ideas including ornaments, games, recipes and more from all 50 plus talented bloggers!
Day 1 - Poinsettia Wreath
Day 2 - Customized Sharpie Mugs Gift Idea
Day 1 - Poinsettia Wreath
Day 2 - Customized Sharpie Mugs Gift Idea
It's Day 3 and we are sharing DIY Christmas Countdown Calendar Ideas!
Days til Christmas Wall Hanging Sign
Supplies Needed for DIY Christmas Countdown
This post may contain affiliate links. Please see my full disclosure policy for details.duck cloth embroidery thread {810} 1 X 3 piece of wood 10 inches long dowel 9 1/2 inches long stain cup hooks eye hooks 25mm ear hoop rings 3/16" eyelets crop-a-dile twine/ribbon stencil numbers {0-9 and an extra 1 & 2} red paint {Americana, country red} cream paint {Americana, buttermilk} drill / bit saw
How to Make Your Own Days til Christmas Wall Hanging
Make the wood block
Cut a 10" piece from a 1" X 3". Sand and stain the wood. Cut out the stencil. I used the font University Roman BT for the "days til" part. For the word Christmas, I used part of a different cut file from the Silhouette store.Also cut a dowel 9 1/2 inches and stain it. {not pictured}
Drill pilot holes for the cup hooks and eye hooks. On the bottom of the board, drill one hole in the center, and one on each end 5/8" from the end. Be sure that the holes you drill are smaller than the screws you will screw in.
Making the pennants
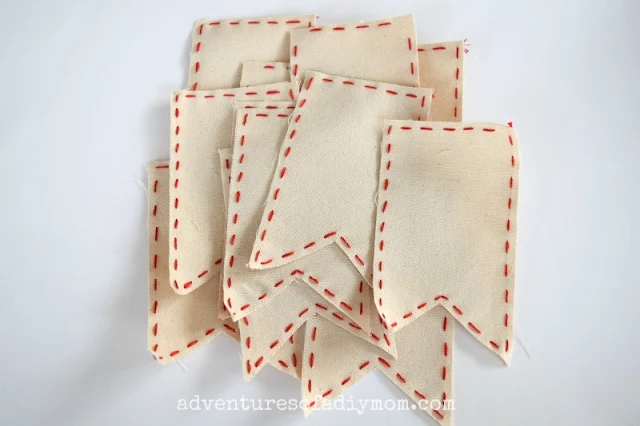
Cut 13 pieces of duck cloth 3 1/2" X 6"Cut a triangle from the bottom of the pennant. The point is 1 1/2" from the bottom and centered.
Embroider a running stitch around the edge of each pennant. I used DMC floss #810.
Punch holes and secure eyelets with crop-a-dile.
Stenciling the pennant and wood block
Time to stencil the numbers onto the fabric. I used the font URW BodoniT, and cut out the stencils on vinyl. You will need one of each number from 0-9, plus an extra 1 and 2. There will be one pennant that is blank. This is for when there's a single digit left til Christmas.
Paint the numbers with the stencils. The vinyl does not stick super well to the fabric, so be careful and don't use too much paint. I used Americana, country red paint.
Also paint the wood. I originally painted the wood red, and I felt like it was hard to read, so flipped it over and re-did it with cream paint {Americana, buttermilk}
Remove the stencils.
Assemble the Days til Christmas Countdown
Insert the eye hooks into the pilot holes at the top of the board. Add the cup hooks to the bottom holes.{See how it's kind of hard to read the lettering? That's why I decided to do cream. I used the other side of the board and just rotated the cup hooks to face the other way}
Place the blank pennant, then the 1, then the 2 in one pile. Place the other numbers in order from 0 to 9 with 0 on the bottom. Insert the hoops through the eyelets.
Insert the dowel into the rings.
Then hang on cup hooks.
Add a ribbon to the eye hooks to hang.
Each day, simply remove the dowel, flip over the pennant, and set back in place.


Rachel, your Christmas Countdown hanger is super cute! Excellent tutorial too. Pinned :)
ReplyDeleteYour post made me laugh because I wasn't sure I needed another countdown either, but hey you can never have to many. Super cute & simple. The number pennants are so cute
ReplyDeleteI love the red stitching around each pendant! Very cute countdown! Pinning!
ReplyDeleteYou have an adorable, great Advent calendar. It would cost me an absolute fortune to make. I don't have a stencil maker and even just to find and buy the right size would be time and money consuming. I don't have a saw/drill etc. So, I'll just admire your handiwork. It is awesome and I admire your skills. Mine skills and tools are in the sewing arena. Thanks for showing your beautiful work and making me think about another area of possible crafting.
ReplyDeleteAdorable! This is so cute. I love how simple and cute it is!
ReplyDeleteWhat a cute idea!! I reckon you can never have to many advent calendars!! Especially when you have little kiddies!! To see the excitement on their faces sure is priceless!
ReplyDeleteThis is so so cute! Thanks so much for sharing your ideas with us at the Happy Holidays link party. Pinned.
ReplyDeleteI love this idea because you really could start counting down for as many days ahead as you want. And you could flip the sign around and add a different holiday and count down to that after Christmas. When Dave was in the army we had count down calendars for when he'd be back from being deployed.
ReplyDeleteI definitely need to add a 3 to the left side. With Thanksgiving being pretty early this year, the kids definitely wanted to use it sooner! I love the idea of using it for other holidays and events.
Delete