Add a little hand stitching to create adorable one of a kind crafts.
You will learn how to apply iron on applique with easy step-by-step pictures and instructions.
Plus download this free tulips in a jar pattern!
Recently I shared my new envelope pillow cover tutorial.
They're SUPER easy, so be sure to check it out.
Today I'm sharing the process of applying the applique to the pillows.
It's pretty easy too, so let's get started!
HOW TO APPLIQUE FABRIC USING IRON-ON ADHESIVE
This post may contain affiliate links. As an Amazon Associate I earn from qualifying purchases. Please see my full disclosure policy for details.SUPPLIES FOR FABRIC APPLIQUE
- Pattern of what you would like to applique (Grab the Tulip Pattern Here)
- Fabric - various colors, I used fat quarters for the applique and a white duck cloth for the pillow
- Iron on adhesive
- Scissors
- Iron
- Light box or window
- Coordinating thread (Optional, if you'd like to add decorative stitching)
If you'd like to try out my pattern, simply click on the image or the link below and you can print it out or download it.
Tulips in a Jar Free Pattern
TRANSFERING IMAGE TO IRON ON ADHESIVE
Next we need to transfer the image to the iron on adhesive.You can do this using a light box if you have one, but I always just use my window.
This is really hard to see, but I hope you can get the idea.
I tape the pattern to the window and then tape the adhesive over it and trace away.
In this photo, I was preparing to trace the jar.
Keep in mind that the images that you trace will be a mirror to the end product.
I placed my tulips with the printing facing the window because I wanted the end result to face the way I drew it.
But really, since there are no words, it doesn't matter much.
Tip: Trace each piece separately so that you can easily cut out the pieces to iron on to different colors of fabric.
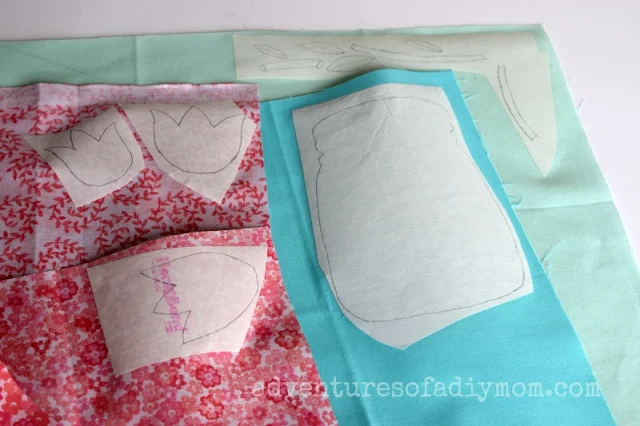
Iron the pattern pieces onto the fabric.
Next, cut out each piece of your applique and arrange it in place.
Piece by piece, remove the backing and iron in place.
Begin with the bottom layers and work your way up.
For this project, I did the jar first, then the stems, then the flowers and finally the leaves.
Lastly, I stitched around the pieces with coordinating thread. This is not necessary, but adds extra cuteness!
Have you done any applique projects? Do you have any tips you would like to add?
MORE CRAFT PROJECTS
Don't forget to pin it!!


I loved seeing your before drawing and your after. It turned out so pretty!
ReplyDeleteThank you! I appreciate it!
DeleteWhat a fun idea! I always used to love the 'transfers' we ironed on t-shirts when I was a kid, but this is so much better, and so much more creative! Sharing on the Hearth and Soul Facebook page and pinning later today. Thank you so much for bringing this fun project to the Hearth and Soul Link Party!
ReplyDeleteGreat tutorial - it turned it really pretty! Thanks for sharing with us at the Snickerdoodle link party!This will be one of my features this Saturday!
ReplyDelete