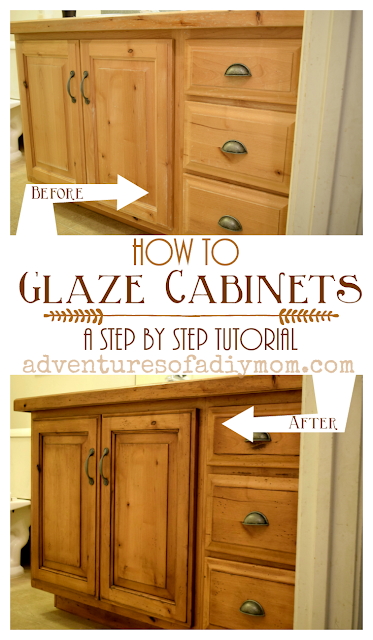
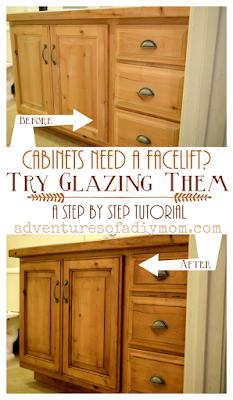
Glazing cabinets is an easy way to update the look and feel of your space.
Using a gel stain as the glaze requires minimal work and maximum results. My kinda project!
I love the deep, rich tones of the wood after glazing it.
Today I'm sharing our adventures in glazing the bathroom cabinet. Keep reading for all the ins and outs of glazing.
The kids splash and spill water all over. Pretty much what all kids do, but over time that water has wreaked havoc on our cabinet finish.
But update the cabinets? To me that seemed like a very scary proposition.
I visualized sanding down all those crevices, applying stripper, reapplying stain and lacquer. All of that would take hours upon hours of work.
It was not something I was looking forward to.
My whole perspective on it changed one weekend. We bought a used piece of furniture that was made from knotty alder. {Our cabinets are also knotty alder}
But it had this rich, darker finish that I absolutely loved.
I REALLY liked it and mentioned that I wished our cabinets had that finish.
Well my husband turned to the internet and determined that it was probably some type of glazing.
A few days later, my husband had work off and we spent the morning at different home improvement stores trying to figure out the products to use to create this same look.
We came home with a gel stain, mineral spirits and lacquer in a spray can.
We decided to experiment on the bathroom. Being unsure of the outcome, we wanted to start in a place that wouldn't be as overwhelming to redo again {like the kitchen!}
It ended up that we LOVE how it turned out and it was so easy to do.
We started this project about 5pm. At 8 pm, not only was it all done, but we had prepared and eaten dinner and had done the dishes during the drying times.
UPDATE: I recently glazed a hutch using this same method. Go check it out: Hutch Makeover
How to Glaze Cabinets with Gel Stain
Supplies Needed to Glaze Cabinets:
- Glaze
- Mineral spirits
- Lacquer - we used a satin finish
- Brush
- Old rags
- Rubber gloves
Glaze- There are a few different types of glaze. We decided to use a gel stain.
We used Old Masters in American Walnut.Honestly the stain was the hardest thing to find. Our first two stops had only 2 or 3 options on gel stain colors. We ended up going to a paint specialty store, then we had the problem of too many options!
I think the stain we picked works really well with our knotty alder cabinets.
Below are a few affiliate links to the products we used. If you have a hard time finding gel stain in your area, this may be helpful. {I will earn a small commission should you choose to buy something, the cost to you is the same}
Tip: If you don't know which stain color will look best, try it out on the inner side of the cabinet.
How to Glaze Cabinets
Step 1 - Remove doors and drawers and remove hardware
Remove the doors. Unscrew and remove the handles and knobs. Take the drawers out.Step 2 - Wash cabinets
Clean off any dirt or grime that may have accumulated. This includes on the doors, drawers and cabinet base.We also have a bit of wood trim on our countertop. I cleaned that off as well.
Step 3 - Apply a light coat of lacquer, if needed.
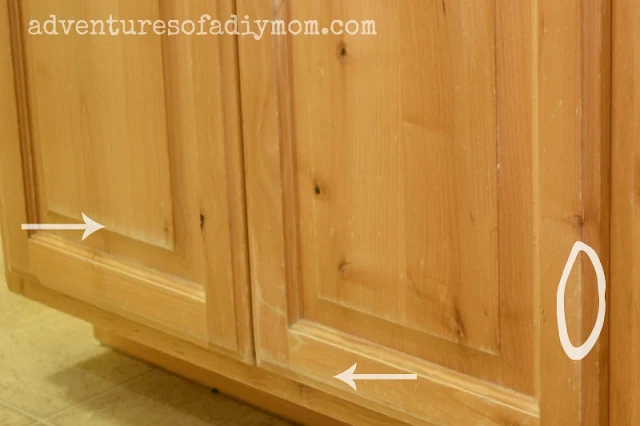
Let me explain this step a little bit. This step is not always necessary. The gel stain is to be applied to a finished piece of wood in order to act as a glaze. If applied directly to unfinished wood, it will act as a stain.In most cases, cabinets will be finished. However, our cabinets {especially along the bottom} had places where the finish was no longer there. I
f we had applied the stain without a barrier, we would have had big splotchy places where the stain soaked into the wood. Thus, the need for a quick coat of lacquer.
Tip: Glaze can also be applied to painted cabinets.
Step 4 - Add interest with "wormholes"
This step is also optional. Basically you create little holes by pounding a nail into the surface of the wood.
I was hesitant to do this, but my husband insisted.
I grew up helping my dad who made cabinets for a living. I took wood shop in high school. I cannot count the hours of sanding I've done to remove blemishes and imperfections from wood.
So to put blemishes there intentionally goes against all I've learned about woodworking.
I will admit that it brings character to the finished product, but I'm not sure that I will do this when we refinish our kitchen.
Step 5 - Apply the gel stain
Using an clean rag {we cut up an old t-shirt}, apply the gel stain to the cabinet door.Really work it into the grooves of the wood and make sure you apply it all over.
Tip: Gel stain dries pretty quickly, so work on one door, drawer or section of cabinet at a time.
Step 6 - Remove excess gel stain
Grab another rag and wipe off the cabinet. The color will remain, but we are working to remove the splotches from application.
The grooves will remain darker in color. We used a brush to blend a little bit along the grooves. Allow the stain to dry before moving on to the next step - 10 minutes or so.
Tip: If you don't like the way it looks, you can wipe it down with mineral spirits and start over.
Step 7 - Finish off with a coat of lacquer
Once the stain has dried, apply two thin coats of lacquer, drying completely between coats.Be sure to work in a well ventilated area, where possible.
In the bathroom we turned on the fan, quickly sprayed, and then closed the door with the fan still on so the fumes didn't spread to the rest of the house.
Repeat these steps for the remaining drawers and the base of the cabinet as well. Be sure to tape off the walls and the inner part of the cabinets.
Tip: If you get gel stain on the wall, or inner part of the cabinet, there's an easy fix. Just pour a little mineral spirits on a rag and the gel stain will wipe right off.
If glazing your cabinets is something that you've thought about doing, just do it already!
Glazing is honestly the easiest home improvement project I've done in a long time.
Don't forget to pin it!!


Wow, what an improvement. The update adds such warmth to the wood. You did a great job. A very informative tutorial. Thanks for sharing.
ReplyDeleteI am going to try this! I have knotty alder cabinets which have yellowed. What do you use to clean your cabinets with? TSP? Thanks!
ReplyDeleteI used dish soap and water. Good luck with your cabinets!
DeleteI love this method, and think it would work great for deepening the color of my oak kitchen cabinets. I happen to have wood floors in the same hue and wondered if this might work on floors, as well.
ReplyDeleteI wish you luck with your cabinets! I think it would work on wood floors - will you let us know if you try it? One thing I would suggest is making sure to finish it with a durable clear coat (maybe multiple coats). Floors will wear so much more quickly than counters, so protecting it is especially important.
DeleteSo you didn't sand the lacquer between it and the gel? My cabinets look just like yours did but I have 27 doors in my kitchen and on an entertainment center. I think I could do this if there is no sanding. Thanks so much for the info!
ReplyDeleteNope, didn't sand them at all! You definitely want that layer of lacquer between the wood and the gel. Otherwise it will stain the wood instead of glaze it. You can totally do this!! It's really easy! If you're on the fence, you could do the inside of a door to see how you like it. Good luck with your cabinets!
DeleteDo you think it would look good on yellow oak cabinets?
ReplyDeleteYes, I think glazing would look great on oak. You might need to test out a few different colors of glaze to see what looks best. (You can test on the inside of the cabinets and remove with mineral spirits if needed). Good luck with your project! I’d love to know how it turns out!
DeleteWhere can you get mineral spirits from?
DeleteYou can get mineral spirits at most hardware or home improvement stores. It will be in the paint/stain section of the store.
DeleteI am wondering if Unknown did this to their yellow oak cabinets and what color they chose? I have yellow/gold 90's oak cabinets that I need to take the gold hue out of! I am wondering if the American Walnut would be dark enough...
DeleteI have not heard if they tried it or how it went. I suggest trying it on the inside of the cabinet to test out the color.
DeleteI'm curious why you finished with a coat of lacquer. I thought that lacquer is sensitive to water. I've been intending to finish with a really tough polyurethane, or similar, if that tends to yellow. I just hate DIY projects you pour a lot of time and love into, and then they're not so durable.
ReplyDeleteLacquer is water resistant. It is true that polyurethane is even more durable. I like the fact that lacquer is a true clear coat and doesn't change the color of the wood and/or stain. Lacquer is also very easy to touch up - just add another coat and it will meld right in with the existing lacquer. That being said, if you feel more comfortable with another type of finish I say go for it!
ReplyDeleteThank you for this information I am excited to try this. My cabinets are beautiful, but a little light for my liking. I am ready to try.
ReplyDeleteThanks for sharing this! I am going to try it on the oak cabinets in my bath - and then, if successful, my kitchen. I have glazed furniture pieces before but never thought to use it on cabinets! So smart!
ReplyDeleteGreat suggestions!! I have light maple cabinets that I need to update for new Buyers and I was wondering if the glaze is brushed on?..and then wiped off to your liking?? I have used this wood glaze on the front door of our home which LOOKS like real wood but must be reglazed every few years. I was told to use a soft clean cloth to apply it and then wipe off to the effect that you want. Any thoughts? And some of my cabinets have wood rope trim in bathrooms and key hole trim in the kitchen. How should that be applied? Thank you!
DeleteWe used a cloth (a piece of an old t-shirt) to apply and a different cloth to wipe it off. We used a brush to help blend from the grooves - this isn't necessary, but we liked how it looked. I think the rope trim will look really good with a glaze. Just apply it with a rag and the glaze will stay in the grooves and really make the trim pop. It may be helpful to have a brush to push the glaze into the grooves if you find that the rag isn't doing the job.
DeleteMy oak cabinets are old and kinda of blotty. You recommend a coat of laquer first. Will this even out the stain?
ReplyDeleteIf the finish is coming off at all, then yes, I would recommend lacquering first.
DeleteMy husband and I followed your steps and did our whole kitchen this past week. We have hickory cabinets that were just finished with clear varnish. I’ve hated them since we moved in. We have these Cabinets throughout our home and our bathroom can’t are being replaced so we practiced with those. They turned out great. So we tackled the kitchen. The transformation was amazing. I wish I could attach pictures. Thank you so much!
ReplyDeleteI tried this today and it didn’t work at all. When I wiped the stain off it all came off leaving the cabinets the same as they were to start with. Did you let the stain sit for a while before wiping? Mine was on around 5 minutes. I used Old Masters in Early American on honey oak. Really bummed out.
ReplyDeleteHmmm, I'm not sure why it didn't work. I let it sit about five minutes and then gently wipe with a soft cloth. It didn't even stay in the grooves? I guess you could try letting it sit longer, making sure the stain becomes tacky before wiping.
ReplyDeleteCan you use gel stain over Latex paint ?
ReplyDeleteI believe so, but try it out on the inner side of the cabinet to be sure.
DeleteI want to try this on my cabinets. I'm curious how yours had help up. Is the gel
ReplyDeletestain pretty durable when cleaning the cabinets on a regular basis?
I'm quite pleased with how well it's held up. It's been two years and it still looks great. I can't say that I clean the actual cabinet doors/drawers very often though. But as long as you finish it off with a coat or two of lacquer, the gel stain is protected under that layer and it should hold up to regular cleaning.
DeleteYou mentioned using soap an water to clean your cabinets prior. I’m wondering about using TSP to clean one of my cabinets that sits above the microwave/hood and has a greasy residue. I’ve tried cleaning that with soap & water before and the greasy residue remains. What are your thoughts about TSP before trying to glaze?
ReplyDeleteI have not used TSP before, but I think it will be just fine. You could try on a small area first if you want to be sure.
DeleteDawn dish soap really works on the above the stove area... at least it did for me... Is the lacquer required.... ?
DeleteYes, lacquer is the best way to finish off the project. The gel stain doesn't set completely and can be wiped, smeared or smudged unless a top coat is in place.
DeleteOther clear finishes (like polyurethane) may work as well, but I don't have experience with anything besides lacquer.
Hi -- have you, or anyone else, glazed the laminate sides of wood cabinets--?
ReplyDeleteI have not tried it on laminate. I found this article for using gel stain on laminate: https://thriftednest.com/how-to-gel-stain-laminate-furniture-yes-you-can/
DeleteShe used it as stain not a glazing technique, but the point is that it will stick to the laminate if lightly sanded first. If you do try it, try first in an inconspicuous place if possible. And let us know the results!