I like to have my kids make things for gifts. I think it helps them to focus more on giving instead of just getting. This year my girls made bracelets for their friends and cousins for Christmas.
Note: This post was originally published on 1-11-2013. It has been updated 7-16-19
This would be a great birthday gift as well. Pair it with a handmade necklace and you're good to go.
How to Make a Beaded Bracelet
I'll admit that these bracelets are kind of addicting to make. They're so very easy and you can create such fun styles and patterns just by switching up the beads.
Supplies to make a beaded bracelet
toggle claspsbeading wire
crimp beads
beads
jewelry pliers
Finished Bracelet Sizes:
{Keep in mind that these sizes fit us, and they might be a good starting point, but your needs may be different}Adult - 8 5/8 "
10 year old - 7 "
5 year old - 6 1/2 "
3 year old 6 1/4"
Steps to Make a Bracelet
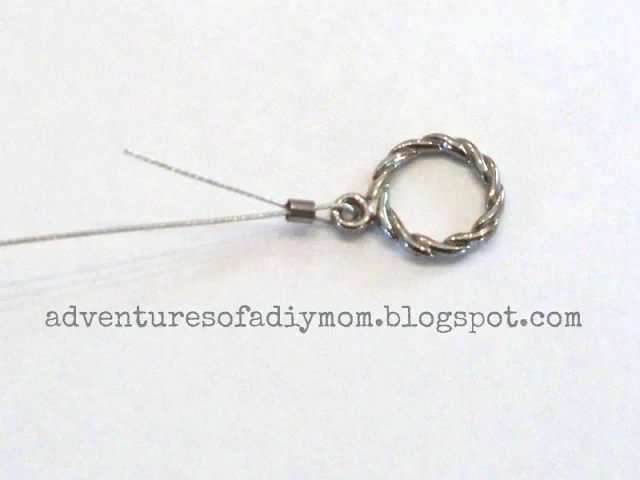
To begin, cut a piece of wire a few inches longer than the finished bracelet size. Add a crimp bead and toggle clasp.
Pull the wire through the crimp bead like shown below. Slide the crimp bead close to the toggle clasp.
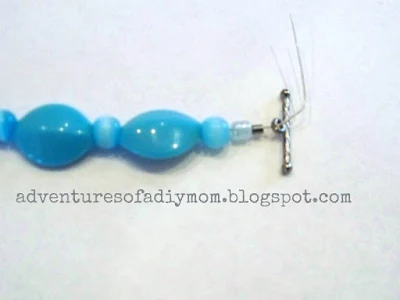
Take your jewelry pliers {or any flat-nosed pliers} and smash the crimp bead. Do not cut the wire short. I have done this in the past and the wire rub against my wrist and it's very irritating. In fact, on this end, you may not need to cut it at all, just string the beads over both wires.
Now is the fun part: adding the beads. My girls loved doing this. At first my little girls just randomly added beads. As we made more, they started to make patterns with the beads.
When you think you might have enough beads, measure it on your wrist {or your kiddo's wrist} to see if it will fit how you want it to. Add or subtract beads as needed.
Now it's time to finish it off. Add a crimp bead and the other toggle clasp.
Next string the wire back through the crimp bead and a few more beads and pull tight. I find this is easiest to do with two sets of pliers. One to grasp the wire as shown below and the other to grasp the end of the wire to pull it tight. Then crimp the crimp bead.
Trim excess wire.
I didn't get very many after pictures {considering we made at least 18 bracelets}. This is one of my favorites. My 5 year old made this for her cousin. She got a little tired after this one. Since the beads were so small, it took a lot longer than the other bracelets we made.
Here are a few of the random patterns they made.
More Bracelet Tutorials
- How to Make a Charm Bracelet
- Kumihimo Braided Bracelet
- Twisted Pearl Bracelet
- Yarn Friendship Bracelets
- Flower Beaded Bracelet
- DIY Pura Vida Bracelets

Beaded Bracelet Tutorial
Yield: 1
Estimated cost: $5
prep time: 5 Mperform time: 20 Mtotal time: 25 M
Learn to make a simple bracelet in this beaded bracelet tutorial.
materials:
- toggle clasps
- beading wire
- crimp beads
- beads
tools:
- jewelry pliers
steps:
- To begin, cut a piece of wire a few inches longer than the finished bracelet size. Add a crimp bead and toggle clasp.
- Pull the wire through the crimp bead like shown below. Slide the crimp bead close to the toggle clasp.
- Take your jewelry pliers {or any flat-nosed pliers} and smash the crimp bead. Do not cut the wire short. I have done this in the past and the wire rub against my wrist and it's very irritating. In fact, on this end, you may not need to cut it at all, just string the beads over both wires.
- Next, add the beads. Make a pattern, or keep it random.
- When you think you might have enough beads, measure it on your wrist {or your kiddo's wrist} to see if it will fit how you want it to. Add or subtract beads as needed.
- Now it's time to finish it off. Add a crimp bead and the other toggle clasp.
- Next string the wire back through the crimp bead and a few more beads and pull tight. I find this is easiest to do with two sets of pliers. One to grasp the wire as shown below and the other to grasp the end of the wire to pull it tight. Then crimp the crimp bead.
- Trim excess wire.
NOTES:
Finished Bracelet Sizes: (Keep in mind that these sizes fit us, and they might be a good starting point, but your needs may be different)

Adult - 8 5/8 "

10 year old - 7 "

5 year old - 6 1/2 "

3 year old 6 1/4"
© 2019 Adventures of a DIY Mom


.JPG)

.jpg)


Very accurate!! Thank you for tutorial))) Don't you wannA visit my diamond source?
ReplyDelete