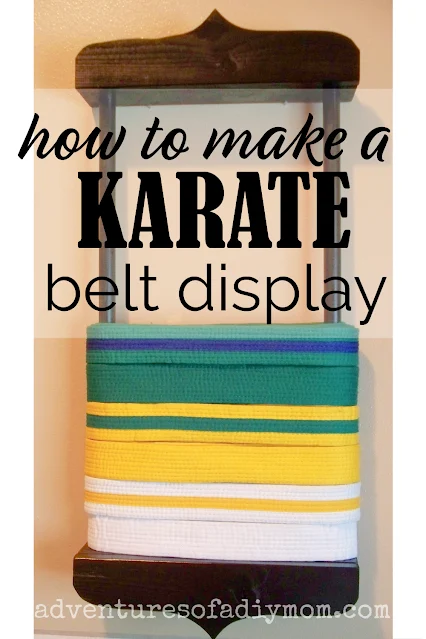
And I wanted to display all that hard work my son was doing. So I made a DIY belt holder for all his karate belts. It's a great way for him to see how far he's come.
And each time he earns a new belt he can add it to the display rack.
DIY KARATE BELT DISPLAY
Update: This was written 6-27-2012. My son is now 18 and still has this hanging in his room to remind him of his hard work. The post was updated on 2-28-23 for clarity.My son has been taking martial arts lessons for a couple years.
He started out doing Little Ninjas, which basically introduces them into martial arts. They earn belts and the top belt is the camo belt.
I kept them in a bag, but the kids would always get them out to play with. Then they would just end up in a pile, or strewn around the house.
How to Build a Karate Belt Holder
This is a project that is not hard at all, but it took me a while to complete. Do you ever have projects like that?I cut out the main pieces before Christmas. They've been sitting in my pantry all that time. I finally got around to finishing it.
This post may contain affiliate links. Please see my full disclosure policy for details
SUPPLIES NEEDED FOR DIY KARATE BELT DISPLAY
- 1 X 4 board
- 2 - 3/4" dowels
- miter or chop saw
- jig saw
- drill with 3/4" bit
- kreg jig pocket hole kit
- screws
- wood glue
- paint/stain
CUT LIST FOR A STANDARD 12 BELT DISPLAY
- 4 - 12" pieces cut from a 1x4
- 2 - 3/4" dowels cut to 23 1/2 " long
Note: I actually used 1x3 firring strips for the pieces with the holes in them. DO NOT do that. Once the belts were wrapped around the dowels, the belts were too thick and it doesn't sit flush against the wall.
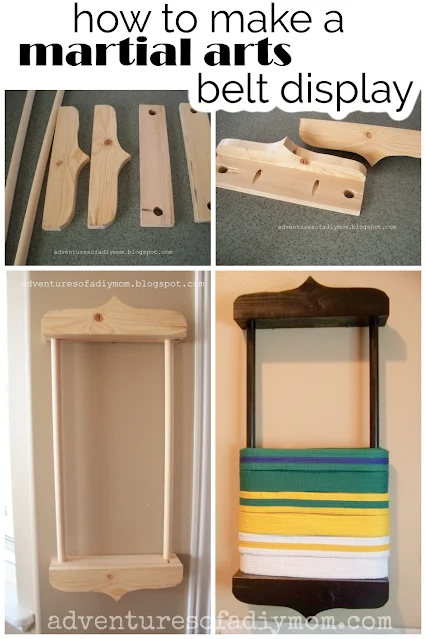
Once your pieces are cut, drill 3/4 inch holes in two of the boards. Measure 1" from the end. Center the hole from front to back.
On the other two boards, you'll want to make some kind of design. Using my silhouette, I cut out a bracket onto paper, then traced it onto the boards. Then using a jigsaw I cut them out.
HOW TO BUILD A KARATE BELT DISPLAY
Next, using my Kreg drill set, I made some pocket holes and screwed the two pieces together.You could also use a brad nails to attach the pieces. If you opt to do that, use some wood filler to fill the nail holes in the wood.
To assemble, place some wood glue on each end of the dowels and insert into the holes. Before the glue dries, measure to make sure it's the same distance between the shelves on both ends. Adjust as necessary.
Stain or paint the belt rack as desired.
If you prefer to leave the wood it's natural color, I recommend applying a lacquer to help protect it. I prefer using lacquer in a spray can. You can find it at the hardware store.
Lastly, wrap the belts around the dowels. I used binder clips to attach the belt to itself in the back so it wouldn't unwind.
The best part about this project is that I used scraps and tools I had on hand. The only thing I needed to purchase was the dowels.
If you have kids in martial arts, one of the things they learn is how to break boards. It's pretty cool, and they come home with these broken boards.
My son broke board below one right at the edge, so they used the same board and had him break it again. It made for a pretty cool display.
Want to make your own? See the board breaking display tutorial.
MORE STUFF TO BUILD
 |
| How to Build a Drying Rack |
Don't forget to pin it!


.JPG)
.JPG)
.JPG)
.JPG)


.JPG)


what a nice way to display and store all of his belts.
ReplyDeleteVery clever idea!
ReplyDeleteDee
You did great.
ReplyDeleteMy son took TaeKwonDo so I know what it's like to have all those belts laying around.
This is a really good idea! I wish my mother would've thought of it when I took Tae Kwon Do when I was a kid, but she's not a crafter... I only have my black belt. The rest of my belts are somewhere in my parents' house. Wait! Maybe I should get them from my parents and then make my own belt holder for all my belts! :-) Thanks for sharing!
ReplyDeleteI love this! I pinned it to make for my son, hope that's ok!
ReplyDeleteWow lovely karate belt holder.Nice one.
ReplyDeleteToddler Karate Santa Monica
How did you mount the rack?
ReplyDeleteI pounded two nails in the wall and the top shelf hangs from them. You can kind of see in the first picture. Hope that helps.
Delete